Scissors in Illustrator
Jul 23rd in Illustration by KamenIn this tutorial, we are going to create metallic scissors. I decided to create somewhat used and old looking scissors. We'll use some basic Illustrator tools, as well as simple shading and highlighting effects to create this illustration. Let's get started!
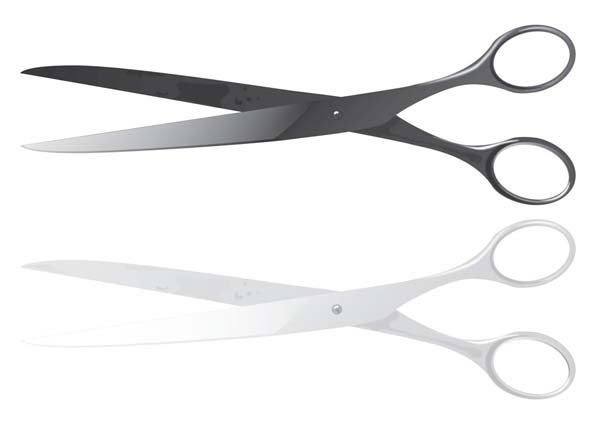
Final Image Preview
Below is the final image we will be working towards. Want access to the full Vector Source files and downloadable copies of every tutorial, including this one? Join Vector Plus for just 9$ a month.
Step 1
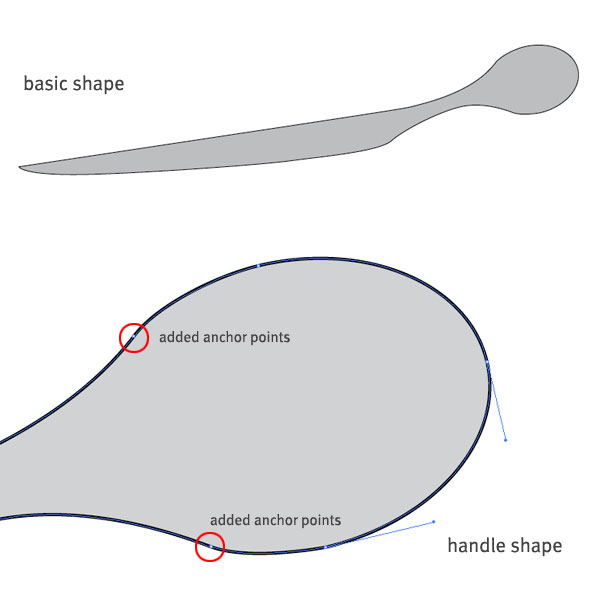
First, we'll divide the scissors in two parts. Select the Pen Tool and create a shape that resembles the first part of the scissors. Now fill it with gray and outline it with black.
For the handle, created an ellipse and rotate it a little. Make a copy of the ellipse and move it away for now. Use the Anchor Point Add Tool to add two points to the original ellipse. as shown below (depending on where you want the handle to start).
Delete the part of the ellipse that is not needed and join the anchor points with Object > Path > Join or Command + J. Tweak the handles of each point until you have a satisfying result.
Step 2
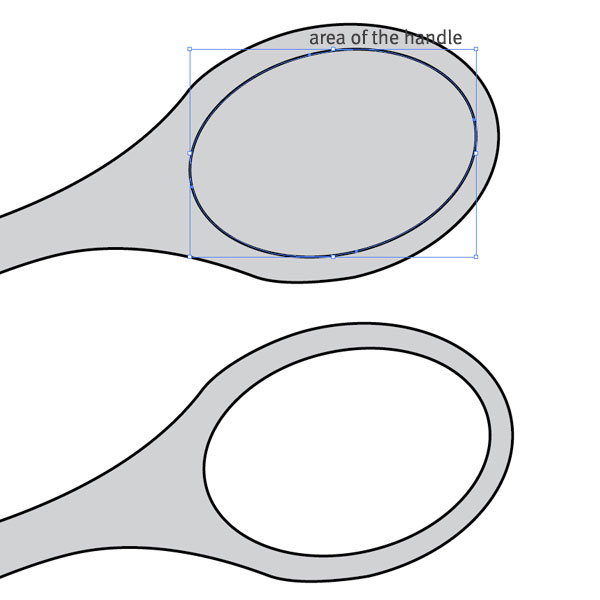
Select the ellipse copy and move it over the handle shape. Bring it to Front and scale it down until you have enough area for the metallic handle. Select both shapes, go to the Pathfinder panel and click Minus Front. Now we have finished part of the scissors.
Step 3
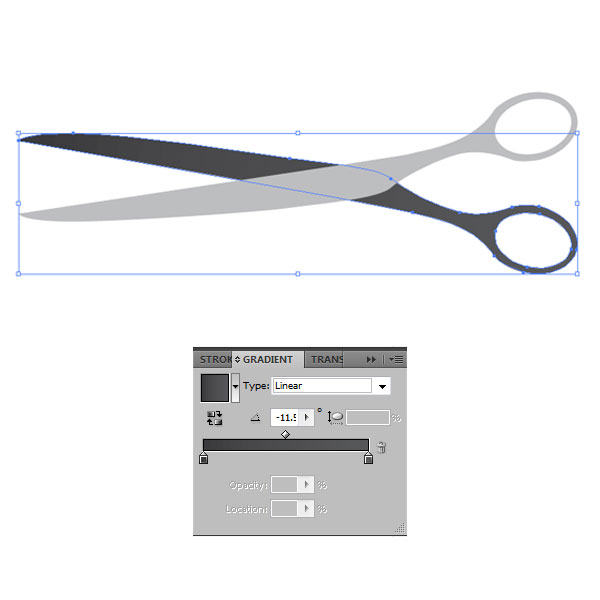
Duplicate the entire shape and reflect it horizontally. Send the copy to the back and adjust it accordingly. We have our basic scissors shape.
We have two options for coloring. We can either make it a silver metallic color or dark glossy metallic scissors. Let's do the second one. Let's go on and apply some gradients. Select the back shape and apply a linear gradient with the colors: K=90 at 0%, and K=80 at 100%. Rotate the gradient by -11.5 degrees.
Step 4
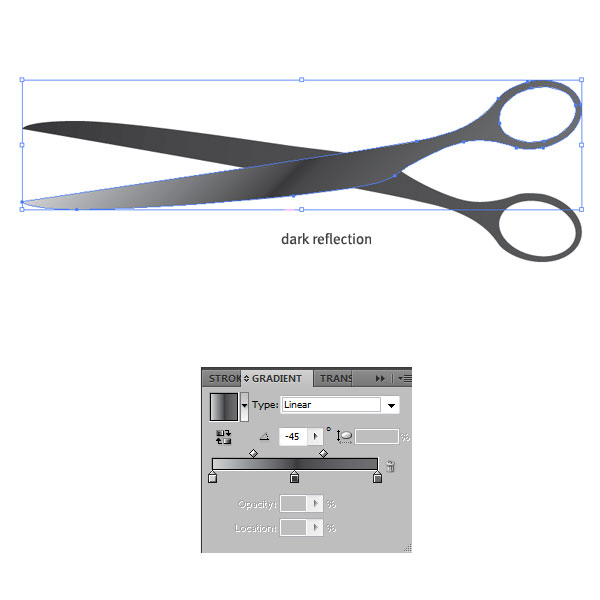
Repeat the process with the front part of the scissors. This time use three colors: K=20 at 0%, K=90 at 50% and K=70 at 100%. Bring the right gradient slider to location of 35% and set the whole gradient at -45 degrees. This will result in applying a really nice dark reflection effect in the middle of the front shape.
Step 5
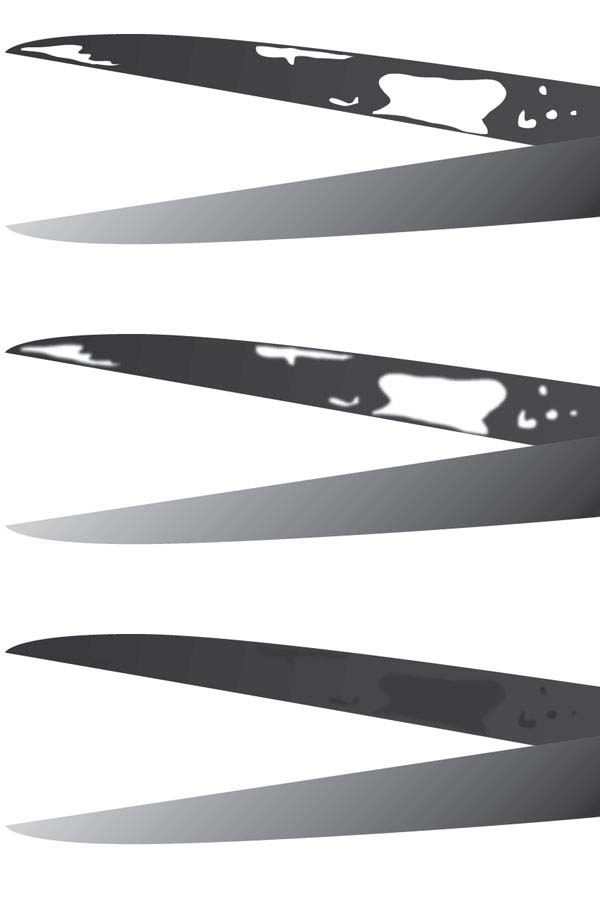
When you take a look at aged and older scissors, you can see that little dots, spots, and irregular shapes of darker colors appear on the inner metal surface over time. Let's apply something like this to our scissors.
We are going to draw some shapes on the inner metal surface (the back shape) of our scissors. With the Pencil Tool draw some irregular, oval shapes. Use a white fill color to see them better. When done, select all of them and give them a Gaussian Blue of 3 pixels, or give each shape different blur settings.
Finally, select all shapes and change the fill color to K=90 and also lower the opacity of some of them to achieve a bit of variety. Keep in mind that the older the scissors get, the more particles will collect on the surface. If you're going to create a really aged look, repeat the process and create more irregular shapes.
Step 6
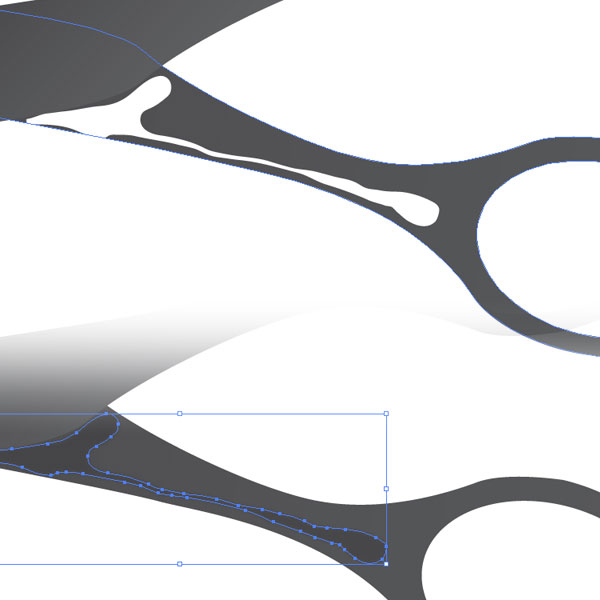
Let's make a similar shape closer to the handle. This time I made a something that resembles dark reflection, smaller by the handle and bigger in the other end. Again, fill it with K=90, give it a Gaussian Blur of 3, and set the Opacity to 70%.
Step 7
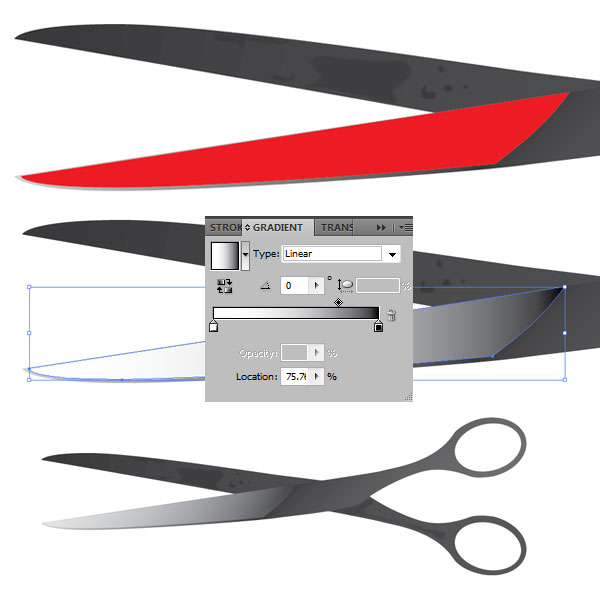
Since we are going for a semi-realistic illustration, our scissors still feel too flat. Let's add a big highlight to the front shape. Use the Pen Tool and following the edges of the scissors, draw a shape similar to the image below.
Give the shape no stroke and a white to black linear gradient. Be sure to drag the gradient slider to 75%. Next, set the shape to Screen blending mode and lower the Opacity to 50%. This will give us a nice metallic highlight with a hard edge and will blend well with the entire shape.
Step 8
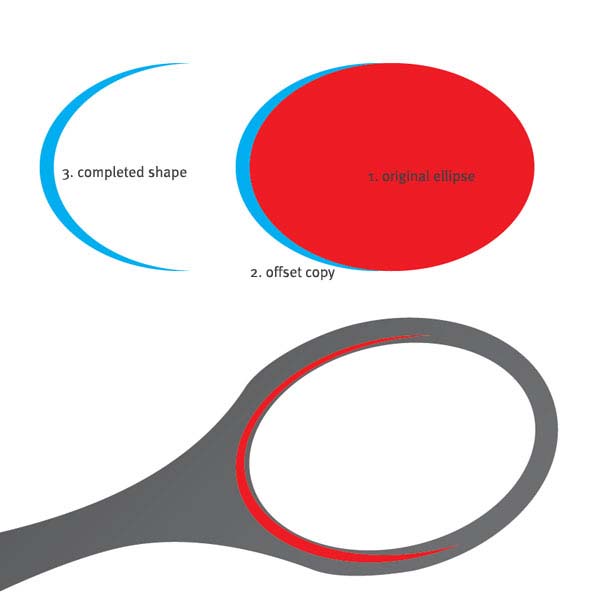
It is time to give a similar treatment to the handles. We have to create some dark and light reflections. Let's start with the back shape's handle. If you are experienced with the Pen Tool, you can proceed and make a crescent shapes.
If you're not, you can use the Pathfinder tools instead. Create an ellipse, make a copy, and offset it to the left. Select both shapes, click either Minus Front on Minus Back, depending on where your copy is. In my case, my copy (the one I wanted to keep) was in the back, so I used Minus Front.
Step 9
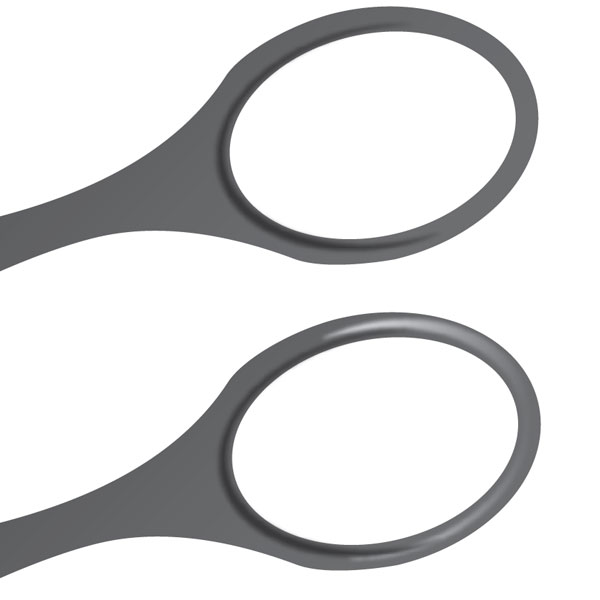
Proceed with the reflections. Use the same technique to create more crescent shapes. In my case, I made one more because I'm not going into too much detail.
Select the first reflection, fill it with K=90 and give it a Gaussian Blur of 3 pixels. Place the second shape opposite the first one - this is going to be a light reflection. Fill it with a white to black linear gradient, apply a Gaussian Blur of 3 pixels. Finally, set it to Screen blending mode. This will make the black part of the gradient fully transparent.
Step 10
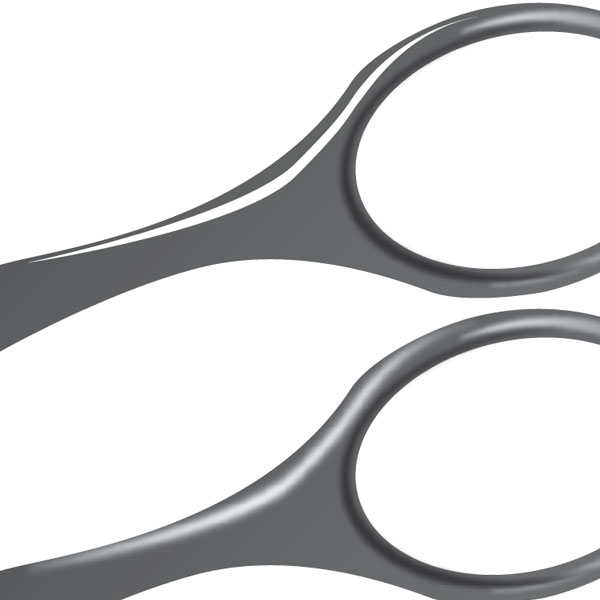
We need one more bright highlight in the handle. This time we are going to stretch it from the middle of the handle far to the left lower part. Grab the Pen Tool, and make a shape following the outer edges of the scissors.
Fill with white and no stroke. Give the shape a Gaussian Blur of 5 pixels. Leave the blending mode to Normal and Opacity at 100%. If you are using a reference image, you can continue adding dark and bright reflections, shadows, and highlights until you are satisfied with the look of the handle. I'm doing this without any reference, so I'm going to leave it here.
Step 11
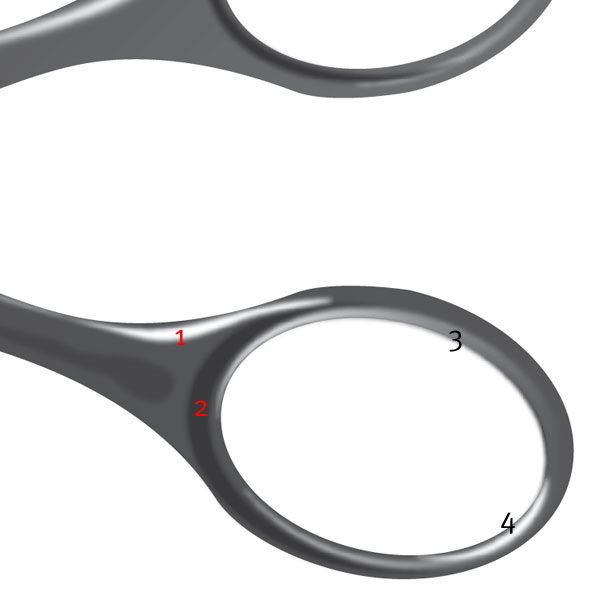
Using the same process from Steps 8, 9 and 10, create reflections for the other handle. You can always duplicate your reflections and flip them horizontally, but I would advise against that.
The way metal reflects light is unique and the reflections depend on what time of the day it is, the viewing angle, the available light source and so on. That's why I made four new reflections for the other handle.
Step 12
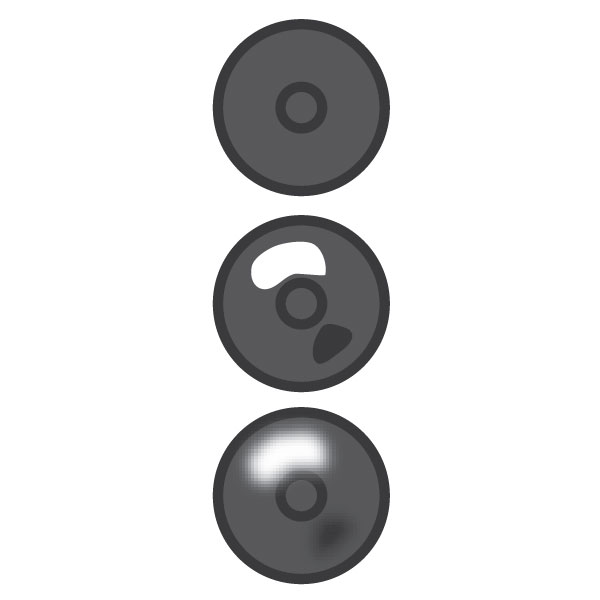
We are almost done. The last thing we need is the small screw that holds both parts of the scissors. Create a circle and set the fill color to K=80 and stroke color of K=90. Create a smaller circle and place it on the middle of the big one. Give it only stroke color of K=90.
Next, create two small irregular shapes with the Pencil Tool. Fill one with white and the other with K=90. Select them both and give them a Gaussian Blur of 2 pixels. Group the whole screw and place it in the middle of the scissors, see final image for placement.
Conclusion
The illustration is finished and we have a semi-realistic scissors. The whole image took me a little under 30 minutes to make, and once I decided on color it was fairly easy to do it.
If you like to do silver metallic scissors, change all the dark gray colors of the image with lighter ones. For example, if your dark gray value is K=90, change it to K=10, K=80 change to K=20 and so on. Additionally, you can create plastic handles for the scissors. I hope you enjoyed this tutorial and have fun applying these techniques in your own illustrations!

Subscribe to the Vectortuts to stay up to date with the latest vector tutorials and articles.


0 comments:
Post a Comment